Gå offline med appen Player FM !
HPR4278: Pi powered Christmas Tree
Manage episode 457331555 series 62200
This show has been flagged as Clean by the host.
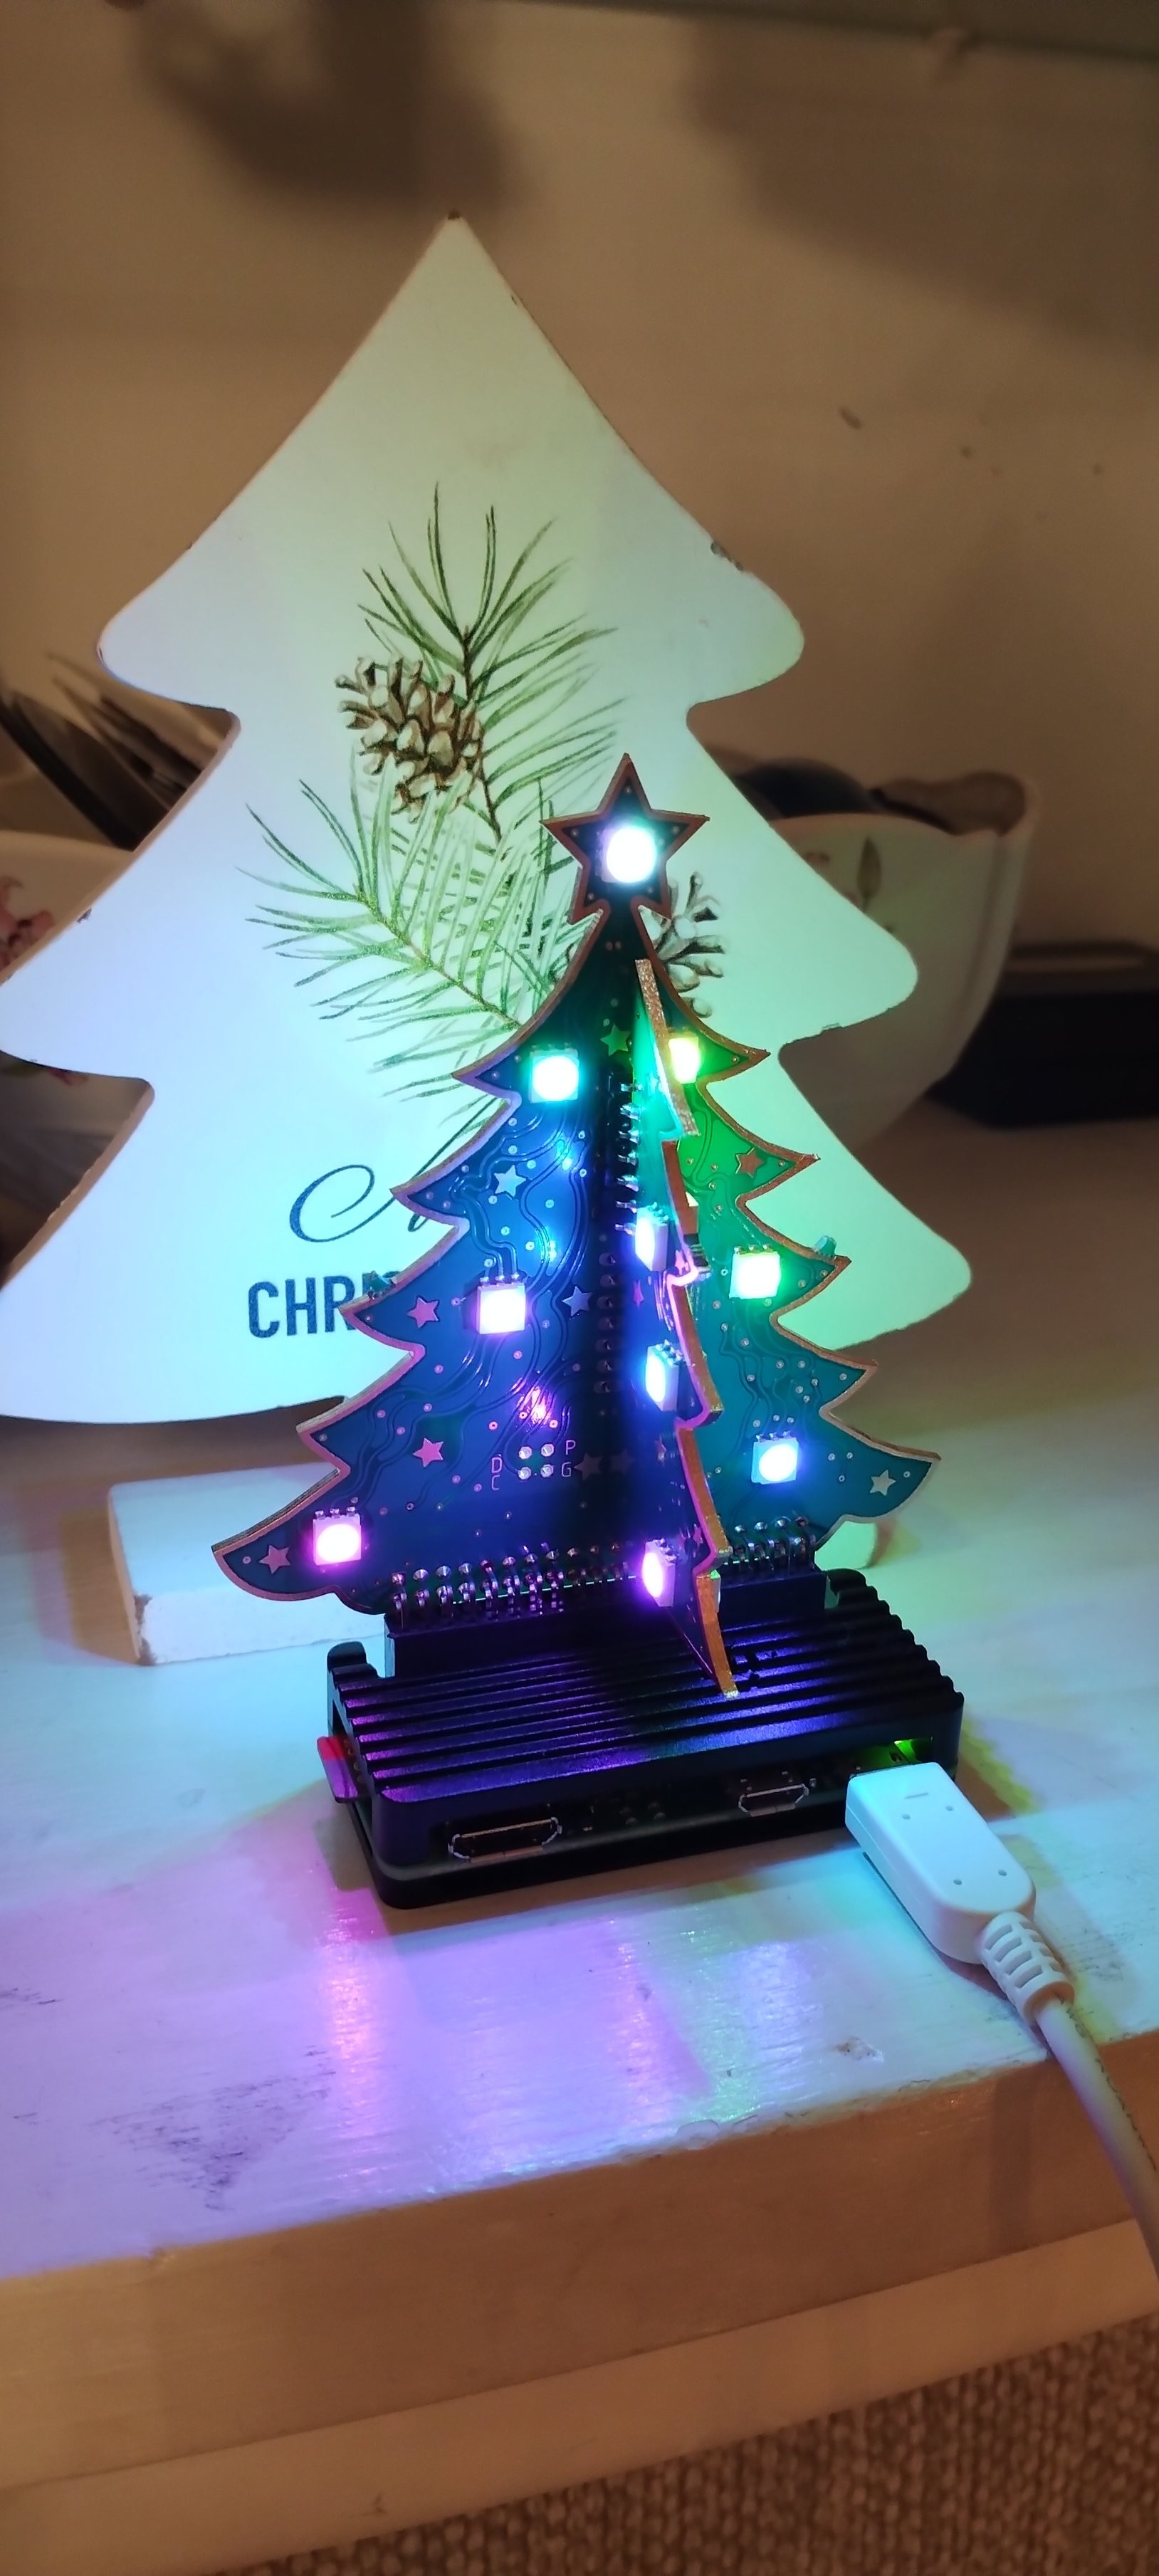
TuxJam co-host Kevie continues his series on Raspberry Pi projects with a look at the 3D RGB Xmas Tree from The Pi Hut. This is compatible with all of the Raspberry Pis,and, if you are going to use this as a stand alone Christmas decoration, it is recommended that you use RaspberryPi OS Lite.
Obviously there does need to be a bit of setup, it is not plug and play, but that would be boring for a Pi project; wouldn't it? As I said: I used mine with a Pi Zero 2W and if you are starting from scratch then I would recommend using Pi Imager as this will allow you to set a user, password, automatic login, wifi and SSH. Call it something like tree for the client name on the network so that it is easy to find. Doing all of this will mean that this Pi never needs to be connected to a monitor. The notes below should take you through the process step-by-step.
- Once the tree has been installed and the Pi is booted up, install GPIOZero (this step is only necessary if you installed RaspberryPiOS Lite)
sudo apt install python3-gpiozero - Create a new directory:
mkdir treeand move into it withcd tree - Now it's time to get the code:
wget https://tinyurl.com/3rrezjv9 -O tree.py - I went for the Xmas Tree Sparkle sequence by Rendzina. To get this simply type:
wget https://tinyurl.com/5e8cxrb5 -O XmasTree_Sparkle.py - Test out the sequence:
python XmasTree_Sparkle.py - To automate the tree we can set a cron task:
sudo crontab -e - Add the following lines to the end of the Crontab file:
30 22 * * * /sbin/shutdown -h nowThis shuts it down at 10.30pm every night.@reboot python /home/pi/tree/XmasTree_Sparkle.pyThis will switch on the tree when the Pi boots up. - Exit and save.
- Reboot the Pi:
sudo reboot
To take a look at the Pi Hut's starting documentation click here
Redzina's custom scripts are available here.

80 episoder
Manage episode 457331555 series 62200
This show has been flagged as Clean by the host.
TuxJam co-host Kevie continues his series on Raspberry Pi projects with a look at the 3D RGB Xmas Tree from The Pi Hut. This is compatible with all of the Raspberry Pis,and, if you are going to use this as a stand alone Christmas decoration, it is recommended that you use RaspberryPi OS Lite.
Obviously there does need to be a bit of setup, it is not plug and play, but that would be boring for a Pi project; wouldn't it? As I said: I used mine with a Pi Zero 2W and if you are starting from scratch then I would recommend using Pi Imager as this will allow you to set a user, password, automatic login, wifi and SSH. Call it something like tree for the client name on the network so that it is easy to find. Doing all of this will mean that this Pi never needs to be connected to a monitor. The notes below should take you through the process step-by-step.
- Once the tree has been installed and the Pi is booted up, install GPIOZero (this step is only necessary if you installed RaspberryPiOS Lite)
sudo apt install python3-gpiozero - Create a new directory:
mkdir treeand move into it withcd tree - Now it's time to get the code:
wget https://tinyurl.com/3rrezjv9 -O tree.py - I went for the Xmas Tree Sparkle sequence by Rendzina. To get this simply type:
wget https://tinyurl.com/5e8cxrb5 -O XmasTree_Sparkle.py - Test out the sequence:
python XmasTree_Sparkle.py - To automate the tree we can set a cron task:
sudo crontab -e - Add the following lines to the end of the Crontab file:
30 22 * * * /sbin/shutdown -h nowThis shuts it down at 10.30pm every night.@reboot python /home/pi/tree/XmasTree_Sparkle.pyThis will switch on the tree when the Pi boots up. - Exit and save.
- Reboot the Pi:
sudo reboot
To take a look at the Pi Hut's starting documentation click here
Redzina's custom scripts are available here.

80 episoder
Alla avsnitt
×Välkommen till Player FM
Player FM scannar webben för högkvalitativa podcasts för dig att njuta av nu direkt. Den är den bästa podcast-appen och den fungerar med Android, Iphone och webben. Bli medlem för att synka prenumerationer mellan enheter.


